Pages

Saturday, December 22, 2012

MOM'S WHITE CUTOUT COOKIES, LC, GF


Christmas just isn't Christmas without my Mom's white cutout cookies.  They were one of the first things I learned to bake together with my mom when I was a kid.  As much as I try to find something new for cookies each year, I just can't do it.  I have to have these.  It was really hard, I must say, giving them up when I began low carbing.  But then I found I didn't have to!!  First I remade them here, but they were not gluten free although very very good!  Tasted like the real thing.  If you are not dropping the wheat, these are great! But I do have to drop the wheat as I found I was allergic to it, or sensitive to it or something.  I can't have it!  And I find it takes me 3 days to get over a reaction once I get it.  So just not worth it!  So I decided today, after searching Christmas cookie ideas, that I came back to these and had to make them gluten free.  They turned out wonderful!!  Not exactly what Mom used to make but pretty close and pretty dern good.

I sprayed my parchment paper with non-stick cooking spray and sprinkled lightly with cornstarch , topped with another piece of sprayed parchment paper and rolled out.

The trick to getting them off easily is a little cornstarch and to run the spatula all the way under the cutout before lifting off carefully 
Fresh out of the oven

I did sprinkle a little bit of real sugar sprinkles on top.  Oh come on! It's Christmas! ;) Ok, you don't have to but I did.

WHITE CUTOUT CHRISTMAS COOKIES, LC, GF                      

1/2  cup  sweeteners of your choice -- (I used 1/4 cup Swerve and 6 packets Truvia)
1/2  cup  Spectrum Organic Shortening, or butter
1  large  egg
1  teaspoon  baking powder
1  teaspoon  vanilla
1/2  teaspoon  salt
2 cups  almond flour
1 teaspoon  xanthan gum

In large mixing bowl, combine sweeteners, shortening, egg, baking powder, vanilla, and salt.  With electric mixer beat on low speed until smooth and creamy and light*.

In separate bowl, combine almond flour and xanthan gum.  Sift together and pour into creamed mixture.  Beat on low speed until well combined and easily forms into a ball. Chill several hours for an easier dough to work with or make cookies right away.  I made them right away. 

Place a piece of parchment paper on counter and spray with non-stick cooking spray.  Sprinkle with small amount of cornstarch or resistant starch.  Place dough onto parchment paper, push down and shape into a square with hands. 

Cover with another piece of parchment paper, sprayed with non-stick cooking spray and roll out to about 1/4-inch.  Cut shapes with cookie cutters*. Roll up remaining dough and roll out again until all dough is used up. Bake in preheated 350F oven about 10 to 12 minutes or until lightly browned around the edges.  let cool completely on pan before removing or they will fall apart. 

*Helpful hint: You can also combine this all in a food processor.

*Helpful hint:  I dusted the top of the dough before cutting out cookies as well as spraying the cookie cutters with non-stick spray.  To remove I sprayed a 13-inch spatula with non-stick cooking spray and very carefully ran it under each cookie thoroughly before lifting it off the parchment paper.  

Frost with your favorite low carb frosting. Decorate as desired. 

                                    - - - - - - - - - - - - - - - - - - - 

Based on 21 cookies/1 Cookie Per Serving: 108 Calories; 10g Fat (81.7% calories from fat); 3g Protein; 3g Carbohydrate; 1g Dietary Fiber (Frosting not included)

Will vary according to how many cookies you cut out.  I got 21.  

Monday, December 3, 2012

BUTTERNUT SQUASH PIE


I made this right after Thanksgiving.  It's taken me a while to post it I'm afraid.  Between almost losing my father a couple times, and concern about him, and a recurrence of an old problem for myself which is causing me severe pain again today, it's been a bit hard to think about posting food.  But here I am, standing as I make this post, as it's too painful to sit.  Does anyone out there know anything about Pudendal Nerve Neuralgia?  It's no fun. I thought I was over it, but it surprised me and came back after 5 years.  The funny (funny as in strange, not "haha") thing about it is that the day I was scheduled to have a nerve block because the pain was unbearable, my son died and as soon as I received the news that my son died, my pain was gone.  God's grace? Shock causing another pain to override this pain?  It's a mystery.  Here it is just days after the anniversary of our son's death and the pain has returned.  It is worsened by sitting or certain exercises.  I won't bore you with it all, but suffice it to say I may not be posting as often until I get this under control once again, if possible.  Hopefully that doesn't mean having to make a trip to the specialist I saw before and go through the terrible embarrassing tests and treatment.  Hopefully I can use the same natural and self-care remedies that worked for me before.  But again, since sitting is the main thing I cannot do, sitting in front of the computer and posting won't happen very often right now.  But, I can stand up with my computer on the counter top :) which is probably better for me. I won't spend as much time on it.

This was a delightfully good pie.  I guess it just tastes very much like pumpkin pie.  So if you like pumpkin pie, (and who doesn't?) then you will like this pie.  A wonderful lady who brings her toddler grandson to one of my classes gave me a big beautiful butternut squash and this is one of the things I made with it.  The recipe is simply my adaptation of the recipe on the back of Libby's Pumpkin.  I like the creaminess that the Nestle Table Creme gives to this.  It is much the same consistency of evaporated milk.  I give the sweeteners I used but you can use whatever you have available and like to use.  All Swerve if you have it, or all Truvia, or Splenda Granular, or liquid sucralose, or a combo of all.  I like using a combo of sweeteners.  It seems to give a better taste.  I finally tried the Swerve which seems to be all the rave right now, and it is good, and easier to bake with, but it is way too expensive for me to use regularly.  I bought some when there was a sale, and then it was still too pricey for me.  Truvia is cheaper and easier to get for me, so that's why I use it a lot.  I combine it many times with liquid sucralose because I got a nice size bottle of that pretty cheap on ebay.  Whatever works for you and you like, should work in this.


BUTTERNUT SQUASH PIE                    

3/4 cup  low carb sweeteners -- (I used 1/4 cup Swerve, 6 packets Truvia, 8 drops liquid sucralose)
1/2 teaspoon  salt
1 teaspoon  ground cinnamon
1/2 teaspoon  ginger
1/4 teaspoon  cloves
2 large  eggs
2 cups  butternut squash -- pureed
7.6 ounce can Nestle Media Crema table cream -- (1 can)
1/4 cup  almond milk, unsweetened
                        Pie Crust:
1 cup  almond flour
1/2 cup  flaxseed meal, golden
1/2 cup  whey isolate, Body Fortress super advanced, vanilla creme -- (or any brand whey protein or whey isolate)
4 packets  Truvia
1/4 cup  coconut oil -- melted

Crust: In 9 or 10-inch pie plate, add almond flour, flaxseed meal, whey isolate, and Truvia, and stir together. Pour in melted coconut oil and stir together until mixture is crumbly.  Press into pie plate on bottom and up sides.

Filling:  In large mixing bowl, combine sweetener of your choice, salt, cinnamon, ginger, cloves, eggs, butternut squash, table cream, and almond milk.  Beat with electric beater until smooth and creamy.  Pour into pie crust.

Preheat oven to 425F.  Bake 15 minutes and then turn oven down to 350F and bake for 40 to 50 minutes longer.  Cool on wire rack and then refrigerate.  Top with whipped cream if desired.

                                    - - - - - - - - - - - - - - - - - - -

12 Servings/Per Serving: 208 Calories; 17g Fat (71.1% calories from fat); 8g Protein; 7g Carbohydrate; 3g Dietary Fiber

NOTES : 4 g. net carbs


Wednesday, November 21, 2012

MY VERY BEST BURGER, and SMOKEY-CHEESE CAULI-MASH

Twas the night before Thanksgiving, and all through the house... the smell of good food cooking, but before the feast, some simple food.  Last night we had hamburgers, and tonight it's hot dogs.

This burger turned out so good that I figured I should share it with you.  I only had 1 lb. of hamburger and needed to make it stretch, so I added some fillers and flavors and it turned out phenomenal.  I didn't say a thing to my family, but waited to see if they would say anything, which they normally aren't going to comment on my great cooking for just a hamburger!  But they both took a couple bites and began saying, "Boy this is good!" And the side of Smokey-Cheese Cauli-Mash was also wonderful.  How many recipes of mashed cauliflower can one have?  I have several, but I think this is my favorite now.  Will do this one again tomorrow for our Thanksgiving meal.  The salad is one I've shared before.  You can find the recipe here.


MY VERY BEST BURGER

1  pound  lean ground beef
1/2 cup  almond flour
1/2 cup  parmesan cheese
2 large  eggs
1/4 cup  hot water
1 teaspoon  beef bouillon -- (or soup base, gluten free)
1 teaspoon  worcestershire sauce
1 teaspoon  liquid smoke flavoring
1/2 teaspoon  instant coffee granules
1/2 teaspoon  onion powder
1/2 teaspoon  garlic powder

Preheat your grill.  In medium bowl, place ground beef, almond flour, Parmesan cheese, and eggs.  Mix together well.

In Measuring cup, combine water, beef bouillon, worcestersire sauce, liquid smoke flavoring, coffee granules, onion powder, and garlic powder.  Mix well.

Pour liquid into meat mixture and mix together well.  Cover and let sit on counter for 20 minutes.

Shape into 7 patties, 1/2 cup each, and grill.

                                    - - - - - - - - - - - - - - - - - - -

7 Servings/Per Serving: 266 Calories; 21g Fat (69.9% calories from fat); 17g Protein; 3g Carbohydrate; 1g Dietary Fiber


SMOKEY-CHEESE CAULI-MASH

1 pound  frozen cauliflower -- (I use frozen but you can use fresh as well)
2 tablespoons  sour cream
2 tablespoons  butter
1 large  egg
1/2 teaspoon  onion powder
1/2 teaspoon  garlic powder
1 cup  smokey sharp cheddar, Hoffman's -- shredded
1 tablespoon  Real Bacon Bits
1/4 cup  Parmesan cheese

In microwavable bowl, place cauliflower and cover.  Microwave on high for about 10 minutes or until cooked soft.  (If you're using fresh cauliflower you need to add a little water.  You can also steam it if you prefer).

In food processor, add cooked cauliflower, sour cream, butter, egg, onion powder, and garlic powder.  Process until smooth.  Add cheese and process again until cheese is melted and mixed in thoroughly.

Spray a 1 quart casserole dish with non-stick spray.  Preheat oven to 375F.  Pour mashed cauliflower into prepared dish and sprinkle bacon bits on top, then cover with Parmesan cheese.

Bake 30 minutes.

                                    - - - - - - - - - - - - - - - - - - -

4 Servings/Per Serving: 343 Calories; 27g Fat (70.3% calories from fat); 17g Protein; 8g Carbohydrate; 3g Dietary Fiber--5 g usable carbs


Friday, November 2, 2012

CHEESY BREAD PIZZA CRUST


Again, this is from the Cheese and Wine Bread recipe which became a Cheesy Loaf of Bread, and now has become Cheesy Bread Pizza Crust.  It's more of a bread-like pizza crust.  Sometimes I like the traditional more bread-like crust and other times I prefer thin and crispy.  This was very tasty for a low carb crust, and closer to a true bread like crust than anything else I've come across for pizza crust so far.  I've just taken my original recipe, and this time used buttermilk rather than wine in the mix, because I don't always want to use wine and others don't always want to use wine, and I wanted to see how it would turn out with the buttermilk.  I was very pleased!  Still had that wonderful yeasty bread smell to it and the texture and all came out very much the same as with the wine.

Just to give you fair warning.  I'm not finished yet with this recipe and where I'll take it!  I have plans for more ideas rolling around in my head with it.

So basically, I just tripled the Cheese and Wine Bread recipe for the pizza crust.  I've also done it doubled making the same size pizza but a much thinner crust.  I like the thicker one better.


CHEESY BREAD PIZZA CRUST

3 large  eggs
3 tablespoons  buttermilk -- (or dry red wine)
1 tablespoon  extra virgin olive oil
1/3 cup  Parmesan cheese (I used the canned)
3 tablespoons  almond flour
1 tablespoon  psyllium seed husk powder
1 tablespoon  nutritional yeast flakes (see note below)
3/4 teaspoon  baking powder
2 drops  liquid sucralose -- (OR sweetener equal to 1 tbsp.)--optional but I think it adds to the flavor

Preheat oven to 350F.  Place parchment paper onto 12-inch pizza pan or baking sheet.

In small bowl, combine eggs, buttermilk OR wine, olive oil, Parmesan Cheese, almond flour, psyllium powder, nutritional flakes, baking powder, and liquid sucralose.  With electric mixer, beat until smooth.  Let sit a minute to thicken slightly.

Pour out onto pizza pan OR baking sheet, and spread evenly with spatula until it reaches the edges of the pan. Bake about 15 minutes.  Remove from oven and top with your favorite sauce and pizza toppings and bake longer until cheese is melted.

Cut into 8 slices.

NOTE: For more information about Nutritional yeast, how it is made, and the health benefits - http://www.truthnhealth.com/2011/10/nutritional-yeast-and-its-benefits/

Yield:
  "1 pizza"
                                    - - - - - - - - - - - - - - - - - - -

8 Slices/Each slice: 85 Calories; 6g Fat (62.2% calories from fat); 5g Protein; 3g Carbohydrate; 2g Dietary Fiber

Sunday, October 28, 2012

CHEESY LOAF OF BREAD

 I could not be more pleased with the way this bread turned out!!!  This is a spin-off from my Cheese and Wine Bread recipe that made one nice bread bun you could slice in two and make a nice sandwich with.  I loved it, and wanted to be able to make a whole loaf of bread the same.


This turned out to be just what I wanted in flavor, texture, aroma (yes, aroma is so important!) I simply multiplied the Cheese and Wine Bread recipe 8 times, put it in a loaf pan and this is what came out.  It's hard to let you know just how high it rose in a picture.  So I took a picture of it in the pan so you can see it from that perspective as well.

You can see how it just rises above the top of the pan.  It is more like a banana bread size.


The texture is very close to a real sandwich bread.  If you like bigger slices you can cut it in half, then set the half sliced side down, and slice lengthwise.  I don't think you'll come out with 16 slices then, but you will have larger slices, so it's a matter of your preference.


CHEESY LOAF OF BREAD                 

8 eggs
1/2 cup  *marsala wine -- (dry)
3 tablespoons  extra virgin olive oil (edit, 1/4/2017 - I no longer add the oil. I find it does not need it)
1 cup  parmesan cheese
1/2 cup  almond flour -- (honeyville is what I used)
3 tablespoons  psyllium seed husk powder
3 tablespoons  nutritional yeast flakes, NOW brand (see note below)
2 teaspoons  baking powder
2 packets  Truvia -- (or 1 tbsp other sweetener)

Preheat oven to 350F.  Line bottom of 8 x 4-inch loaf pan with parchment paper and spray pan with non-stick cooking spray.

In medium mixing bowl, add wet ingredients: eggs, wine, and oil.  Beat together well.  Add dry ingredients: Parmesan cheese, almond flour, psyllium powder, nutritional yeast, baking powder, and Truvia OR other sweetener.

Mix with electric beaters for 2 minutes or until smooth.  Pour into loaf pan.  Bake 30 minutes, then place an aluminum foil tent over the top and bake another 30 minutes.  Remove from oven and turn out of pan onto a wire rack to completely cool before cutting.  An electric knife helps to cut nice even pieces.  I got 16 good slices out of this.

*Helpful Hints: If you don't have wine, you can use cooking wine, or if you choose not to use wine, you can try buttermilk. The wine does seem to add to the flavor and texture and rise, and I haven't tested it yet with buttermilk, but that would be what I would try first, myself.
*Editing this to say I have made it now with buttermilk and I baked it 15 minutes longer and it came out fine.  It did not rise as high with the buttermilk as with the wine but it wasn't that much of a difference.

NOTE: For more information about Nutritional yeast, how it is made, and the health benefits - http://www.truthnhealth.com/2011/10/nutritional-yeast-and-its-benefits/
                                    - - - - - - - - - - - - - - - - - - -

16 Slices/Per Serving: 122 Calories; 8g Fat (63.2% calories from fat); 7g Protein; 4g Carbohydrate; 3g Dietary Fiber

NOTES : 1 useable carb per slice


Monday, October 22, 2012

WHITE CHILI WITH TURKEY SAUSAGE


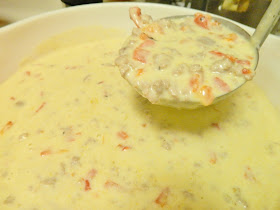
Funny how different the coloring turned out in my photos.  It's just a matter of lighting in my house. One was taken in my kitchen, and the other at my dining room table.  The top one is truer to the actual color.  The lighting in my house is terrible so I have to keep adjusting the lighting on my camera and play with it.

A very good friend gave me a recipe for white chicken chili that sounded so yummy but it wasn't low carb, so I used her recipe and went from there.  I had to make a substitute for condensed cream of chicken soup.  Her recipe used chicken and mine uses Jennie-O turkey sausage, but I want to make this with chicken next time.  My family loved this.  It made a huge bowl (7 cups), and with 4 of us, there were no leftovers!  My two sons gobbled it right up.  I may do some tweaks yet with it, but it was pretty good as is.  I may add a bit more spice next time?  Maybe add some nopalitos?  Maybe some hot sauce?  I dunno.  I loved it as is.

WHITE CHILI WITH TURKEY SAUSAGE

                   
2 pounds  Jennie-O turkey sausage (breakfast) -- browned and drained
16 ounces  Green taco Sauce, Ortega
16 ounces  Mezzetta Roasted Red Bell Pepper Strips -- drained and chopped
1 cup  water
1 recipe  Condensed Cream of Chicken Substitute -- *see recipe below

In 2 quart heavy saucepan, combine turkey sausage, green taco sauce, roasted red peppers, and water.  Bring to boil, reduce heat and simmer 30 minutes.

Add condensed cream of chicken soup, heat to boil, stirring constantly, add more almond milk or water as desired to bring to the consistency you want.

Options: In place of ground turkey sausage, cook 1 whole chicken, debone and cut into chunks.

                                    - - - - - - - - - - - - - - - - - - -

Seven 1-cup servings/Per Serving: 474 Calories; 36g Fat (69.9% calories from fat); 25g Protein; 10g Carbohydrate; 0g Dietary Fiber;


CONDENSED CREAM OF CHICKEN SOUP SUBSTITUTE                    

8 ounces  Philadelphia 1/3 less fat Cream Cheese -- (less calories, same amount of carbs as full fat)
1 tablespoon  Better Than Bouillon Chicken base OR other gluten free chicken   base
1 teaspoon  garlic powder
1 teaspoon  onion powder
2 cups  almond milk, unsweetened
1 tablespoon  arrowroot powder -- (or corn starch-2 g carbs per serving, optional, for thickness, or add more cream cheese if you prefer to get thickness desired)
1/4 cup  almond milk, unsweetened

In medium saucepan, combine cream cheese and chicken base.  Add garlic powder and onion powder.  Heat, stirring constantly, over medium high heat, until blended and cream cheese is melted.  Gradually add in almond milk, stirring with a wire whisk.  Continue heating and stirring until mixture comes to a boil.  Reduce heat.  Combine arrowroot powder OR cornstarch with 1/4 cup almond milk, and whisk into hot mixture.  Boil and stir for a minute more.  Remove from heat and let cool.

You can use this in recipes for a white sauce, for cream of chicken substitute, for cheese sauces (just add shredded cheese)


Yield:
  "2 1/4 cups"
                                    - - - - - - - - - - - - - - - - - - -

4.5-1/2 cup servings/Per Serving: 184 Calories; 14g Fat (75.3% calories from fat); 6g Protein; 5g Carbohydrate; trace Dietary Fiber;


Thursday, October 18, 2012

CHOCOLATE AND PEANUT BUTTER SWIRL CHEESECAKE


Cheesecake is a wonderful dessert for low-carbers!  And what a delight that is! Rich, creamy, and certainly no feelings of a "diet food" or deprivation when one eats it.

What I would do differently making this again is add more sweetener.  In the recipe below I have the amount I actually put in it, but you can taste the batter and adjust to your liking.  It seems everyone has a difference there in how sweet they like things.  It is sweet enough as a cheesecake goes, but with chocolate I prefer very sweet.  So I'd probably add about 1/4 cup xylitol to this next time.  Top this with a dollup of whipped cream and your good to go!

We're celebrating our 37th wedding anniversary today! This is our anniversary cheesecake.  I wanted something special.  What is more special than chocolate and peanut butter and cheesecake all in one?

I actually weigh about 10 lbs less today than I did on my wedding day!


CHOCOLATE AND PEANUT BUTTER SWIRL CHEESECAKE                    

CRUST
1 cup  flaxseed meal, golden -- (You can use brown flax, but I prefer golden for the milder flavor)
1/3 cup  whey isolate, Body Fortress super advanced, vanilla creme -- (this is what I used but you can use whatever brand you have)
1/4 cup  cocoa powder
6 packets  Truvia -- (or sweetener equal to 1/4 cup)
1/4 cup  melted butter
FILLING
1 1/2 pounds  cream cheese -- softened
3 large  eggs
12 drops  liquid sucralose
12 packets  Truvia -- (or use 1 1/8 cup sweetener in place of both sucralose and Truvia)
2 tablespoons  cocoa powder
1 teaspoon  blackstrap molasses
1 teaspoon  vanilla extract
2/3 cup  heavy cream
10 pieces  Lindt 85% Cocoa bar -- (1 entire bar), chopped in small pieces
1/4 cup  coconut oil
SWIRL TOPPING
1/2 cup  natural peanut butter -- Unsweetened
4 packets  Truvia

Preheat oven to 350F (175C).  Grease 9 to 10-inch Springform pan.

CRUST:  In food processor, combine flaxseed meal, whey isolate, cocoa powder, and Truvia.  Pulse until blended together.  Pour in melted butter and pulse until it is well combined and crumbly.  Press into bottom of Springform pan. Set aside

FILLING:  In large mixing bowl, combine cream cheese, eggs, liquid sucralose, Truvia, cocoa powder, blackstrap molasses, and vanilla extract.  Beat until smooth and creamy.  In small saucepan, heat heavy cream to a boil.  Remove from heat and stir in Lindt bar and coconut oil until melted and smooth.  Pour into cream cheese mixture and beat well.  Pour into prepared crust.

SWIRL TOPPING: In small bowl combine peanut butter and Truvia.  Microwave on high for 20 to 30 seconds or until it is warmed and soft.  Place dollups on top of cheesecake and with a knife, cut in and swirl around through each dollup.

Bake 50 minutes.  Turn off oven, crack open oven door and let cool for 10 minutes inside oven. Remove and place on a wire rack and cool completely. Carefully run a knife around edges and remove outside of the pan, before chilling.  Chill completely in refrigerator before serving.  Serve with whipped topping if desired.

                                    - - - - - - - - - - - - - - - - - - -

16 Servings/Per Serving: 394 Calories; 36g Fat (79.9% calories from fat); 11g Protein; 9g Carbohydrate; 5g Dietary Fiber

4 g useable carbs per serving


Thursday, October 11, 2012

CHEESY NOPALITO CHICKEN AND SPICY PUMPKIN


I had a few bites off this before I decided to make it a blog post.  It turned out to be so good I decided to make it a post.  I'm leaving my house in 15 minutes though, so it's going to be a very short blog post and I have not put this into MasterCook to get the nutritional info but it's pretty simple.  The chicken, really barely any carbs.  Nopalitos actually lower my blood sugar when I eat them, so I don't even count the carbs in them.  The taco sauce has zero carbs.  Most of the carbs would be in the pumpkin.

CHEESY NOPALITO CHICKEN

4 chicken breast halves (skinless and boneless)
Ortega Green Taco Sauce (enough to cover each chicken breast
About 1/2 cup chopped nopalitos
chopped onion
Fiesta Blend shredded cheese (or cheese of your choice)-enough to cover each chicken breast

In bottom of 9 x 13-inch baking pan, place each chicken breast.  Cover each with green taco sauce.  Top this with nopalitos, then onion.  Sprinkle shredded cheese over top of all.  

Bake in preheated 375 degree F oven for 50 to 60 minutes

SPICY PUMPKIN SIDE DISH

I can pumpkin puree
1 tsp blackstrap molasses
1 tsp pumpkin pie spice (I love Trader Joe's!)
8 packets Truvia
8 drops liquid sucralose
1/4 tsp salt
1 tbsp butter

In medium saucepan, place pumpkin puree, molasses, truvia, sucralose, salt, and butter.  Heat, stirring constantly until heated through and butter is melted.  

Friday, October 5, 2012

CREAMY CAULIFLOWER AND BACON SOUP, DAIRY FREE

It's soup weather again!  It went from hot to cold really fast here in MN.  It does that here.  You can have the air conditioner on one day and the furnace the next.  Or you can actually have both going at different times in the same day.  That's Minnesota fer ya.  Gotta love it!  I do.  I love the mixture of weather here in Minnesota.  It's no wonder it's so often the topic of conversation.  And then the next topic is good food, like warm hearty soup on a cold day.  Visit my facebook page and join in on sharing more soup recipes! There's some great ideas already posted.


I made this one dairy free, not because I cannot have dairy, but I just decided to cut down on my dairy today.  I'm having some congestion, so don't want anything that might possibly add to that.  At the bottom of the recipe I have some suggestions for variations also.


 CREAMY CAULIFLOWER AND BACON SOUP

6 slices  bacon -- (I use Hormel natural bacon)
3 stalks  celery -- chopped fine
1 pound  cauliflower
32 ounces  chicken stock -- (homemade is best if you have it, otherwise I use Rachael Ray's)
1 tablespoon  minced garlic
1/2 teaspoon  onion powder
1/2 teaspoon  thyme
1/2 teaspoon  salt -- (or to taste)
1/4 teaspoon  pepper

Cut bacon into small pieces with a scissors.  In 3 or 4 quart saucepan, cook and stir bacon pieces until crispy.  Remove bacon onto paper towel, but keep the grease in the pan.  Add celery and cook, stirring, until tender.  Add cauliflower, chicken stock, garlic, onion powder, thyme, salt, and pepper.  Stir together and cook on low for 15 minutes or until cauliflower is tender.

Place most of the soup into a blender, (I used a Ninja) and pulse until pureed.   I leave a small amount of the vegetables in the bottom of the pan for a few chunks.  Pour pureed soup back into pan.  Add bacon pieces.

Options:  I made this to be dairy free, but if you want it creamier and you can have dairy, add some shredded cheese, or if you don't want dairy, add 2 tbsp of Nutritional yeast flakes for a cheesy taste.  Also you could add some heavy cream if you want a creamier soup.  This is pretty much a base recipe.  Another variation is to add roasted red peppers, or a few carrots.  Variations are endless.  Just be sure to add the nutritional value for whatever you add to the soup.  I think I may try this with a jar of Gia Russa Alfredo sauce next time.  I like this Alfredo because it uses natural ingredients and is wheat free and makes a good substitute for a creamed soup.

This made 5 scant cups. Each serving is about 1 cup.

                                    - - - - - - - - - - - - - - - - - - -

5 Servings/Per Serving: 91 Calories; 4g Fat (43.0% calories from fat); 5g Protein; 7g Carbohydrate; 3g Dietary Fiber


Monday, September 24, 2012

SAUSAGE AND CHEESE MUFFIN LOAVES


This was such an easy dish to throw together for supper tonight.  Turned out quite tasty and we decided they are keepers.  This went really well with my Creamy Corn and Cauli Casserole which you can find on Page 203 of Low Carbing Among Friends, Vol. 2, and a lettuce and kale salad.


SAUSAGE AND CHEESE MUFFIN LOAVES                    

1 pound  Jennie-O turkey sausage (breakfast)
1 large  egg
1/4 cup  almond flour -- (I used Honeyville)
1/4 cup low carb Barbecue Sauce
1/2 teaspoon  salt
2 sticks  smoked string Cheese, (Baker is the brand I use)
2 tablespoons  Real Bacon Bits
2 tablespoons  Parmesan cheese

Preheat oven to 375 degrees F.  In small bowl, combine turkey breakfast sausage, egg, almond flour, Barbeque sauce, and salt.  Mix together well.  Divide evenly into 12 greased muffin tins.

Cut string cheese sticks into 12 equal pieces by cutting into 3rds first and then each 3rd cut in half.  Place 1 piece in the middle of each muffin.  Sprinkle each with 1/2 tsp of bacon bits, and then 1/2 tsp each of Parmesan cheese.

Bake 30 minutes.

Variation: You can use pork sausage or ground beef or turkey as well if you prefer.  Nutritional info would change.

                                    - - - - - - - - - - - - - - - - - - -

12 Servings/Per 1 Serving: 127 Calories; 10g Fat (68.5% calories from fat); 9g Protein; 1g Carbohydrate; trace Dietary Fiber;

Sunday, September 16, 2012

BROWNIE CREAM CHEESE DANISH


I'm still doing things with the Brownie recipe!  This is pretty simple.  Just whip up a batch of the brownie recipe, place about 2 tbsp in each well of a whoopie pie pan, or if you don't have one, just use a cookie sheet lined with parchment paper, and make 12. Make the cream cheese filling which is from this recipe, for the Cream Cheese Danish, plop some in the middle, and bake.  I also used some of the cream cheese filling, which I had left over to try adding to my Donut Bun and made a glaze to drizzle over it.


If I did it again, I would spread more of the cream cheese on the top rather than a blob of it in the middle.  I had to microwave it longer which made the outside drier.  But it was tasty.  The glaze is simply 2 packets of truvia powdered in my coffee grinder, and about 1/2 tsp of cream stirred into it, or just enough to make it a drizzling glaze.  If you don't like Truvia, you can use any sweetener of your choice, about a tbsp, powder it in your coffee grinder, and add the cream.  I've made a great powdered sugar sub out of a combo of 1 part Splenda granular to 1/2 part xylitol, powdered.  Swerve would work great I'm sure if you have it as well. I've never used it though.

Just one more variation for you! I hope you enjoy it.

Tuesday, September 11, 2012

BROWNIE ICE CREAM SANDWICH


I came back from visiting family, after a family health emergency (which all turned out well in the end), with cravings for things I couldn't eat.  This just very very rarely happens to me anymore.  I don't normally get cravings.  But I had to leave immediately, without having time to plan food, making sure I have things to eat that are gluten free, low carb.  I normally am fine with my own things, and not bothered at all by what everyone else eats.  But since I didn't have much with me, other than making myself a couple bread buns so I could at least make a sandwich while there, I was very hungry most of the time, watching others enjoy food, while just making do with the little that I could eat.  It wasn't even that there was a lot of food around me! But somehow I kept thinking of all the things I couldn't enjoy that others could.  I was determined when I got home to make some of the foods that came into my head, or that I saw, or that I dreamed of, to enjoy.  
This doesn't happen often, but when it does, I get through it by telling myself, "I can make that".  When I do, I'm satisfied, I get over it, I go on.  

So chocolate and ice cream was on my mind when I got home.  The brownie/cookie part is from my Chocolate Fudge Brownie recipe, pretty simple, and worked really well for this.  


CHOCOLATE FUDGE BROWNIES
                
2 oz.  unsweetened chocolate
1/3 cup  coconut oil -- or butter
1 cup  sweeteners -- (12 packets Truvia, 1/4 cup xylitol, 8 drops liquid sucralose)
2 eggs
1/2 tsp.  vanilla
1/2 cup  almond meal
1/4 cup  flaxseed meal, golden
1/2 tsp.  baking powder
1/4 tsp.  salt

In medium saucepan, over medium low heat, melt chocolate and oil. Remove from heat and add sweeteners, eggs, and vanilla.  Mix well, and add the remaining ingredients.  Stir well and pour whoopie pie pan to fill 12 cups in the pan. Bake in pre-heated 350 degrees F oven for 10 to 12 minutes.  Do not over bake!  The longer you bake, the more cake-like, the less, the more fudgy, and brownie-like.  

                                    - - - - - - - - - - - - - - - - - - - 
12 Servings/Per Serving: 127 Calories, 11 g fat, 4 g protien, 4 g carbs, 2 g fiber
Entire Recipe: 1519 Calories, 138 g fat, 50 g protein, 48 g carbs, 18 g fiber

The ice cream filling was the same recipe as the Ice Cream Dibs

Ice Cream:
1/2  cup  heavy cream
2 tablespoons  sugar-free syrup -- (such as DaVinci or Torani)
1 tablespoon  sugar-free vanilla pudding and pie filling

In a small bowl, whip together cream, sugar-free syrup, and vanilla pudding and pie filling mix until it is stiff.  

For 1/12 of recipe:
38 Calories; 4g Fat (84.6% calories from fat); trace Protein; 1g Carbohydrate; 0g Dietary Fiber;

For 1/6 of recipe:  77 Calories; 7g Fat (84.6% calories from fat); trace Protein; 3g Carbohydrate; 0g Dietary Fiber

To make the sandwich:
After brownie cookies have cooled, spread the filling on a cookie and cover with second cookie to make a sandwich.  Wrap each cookie individually and place in a freezer bag in your freezer.  These also are really good before you freeze for a whoopie pie!  Or to tell you the truth, I had a hard time not eating them just slathering the filling onto a cookie and eating it right away.  (I did that with one), so you can choose which way you like them.  Unfrozen or frozen, they are delightful to the taste buds! Enjoy!


Saturday, September 8, 2012

CHICKEN NOODLE CASSEROLE

It was a cooler day today.  One of those days when you think of casseroles.  Casseroles, to me, are comfort food.  This was comfort food.  A rich, creamy casserole with chicken, roasted red pepper strips, nopalitos, zucchini noodles, and a rich, cheesy, creamy sauce.  Very quick and easy to put together and toss into the oven.


CHICKEN NOODLE CASSEROLE                    

20 ounces  canned chicken -- (2 10-oz. cans)
2  medium  zucchini -- sliced lenghtwise with vegetable peeler into noodles
15 ounces  Mezzetta Roasted Red Bell Pepper Strips -- (1 jar drained)
1  cup  nopalitos -- chopped (found in Mexican section of store)
15 ounces  GIA RUSSA Alfredo Sauce
1  cup  fiesta blend shredded cheese -- (or other cheese of your choice)
1/4 cup  Parmesan cheese

Spray 2 qt. casserole dish with non-stick cooking spray or olive oil.  Add chicken, zucchini noodles, red pepper strips, and nopalitos. Stir together. Stir in alfredo sauce.

Add shredded cheese and stir until well mixed.  Sprinkle Parmesan cheese on top.

Bake in preheated 350 degree oven for 1 hour.  Let sit for 5 minutes and serve.

                                    - - - - - - - - - - - - - - - - - - -

6 Servings/Per Serving: 445 Calories; 32g Fat (64.3% calories from fat); 29g Protein; 11g Carbohydrate; 1g Dietary Fiber

Tuesday, August 21, 2012

HOT DOGS IN A BUN

A quick and great tasting way to have your hot dog and bun cooked together in 10 to 12 minutes.  This is simply my CHEESE AND WINE BREAD recipe with a couple hot dogs cut in half and added.  I used the GT Express again for this.  (I'm really not trying to sell these, and I have no financial gain in them at all!).  I just am  learning to use the thing more and loving it for easy low carb lunches etc.  But I think you can probably do this in the microwave as well.  I just haven't tried it so you're on your own with that experiment.  Or bake them in the oven perhaps in small bowls?  If you try it please report back and let us know how it works.

Hot Dogs In a Bun
I simply preheated my GT Express 101, mixed up the batter for 1 recipe of the bread, cut 2 gluten free, natural hot dogs in two, and in both sides of the GT Express 101, I placed a small amount of the batter, one hot dog half, and covered with the rest of the batter.  Close the lid and cook 10 to 12 minutes.  I think I cooked it for a full 12 this time.  Nutrition info will depend on the hot dogs you use.


I usually just eat my hot dog wrapped in Bongard sliced cheese that has been nuked for 40 seconds and immediately wrapped around the hot dog before it hardens.  That's a great idea too, when you're in a hurry and don't really want a bun.  Most of the time I don't.  But this was great, and just right for me and hit the spot for something a bit more substantial.  Great with a tossed salad!


Monday, August 13, 2012

CHEESE AND WINE BREAD


I would call this bread a definite breakthrough!  I've been doing bread experiments lately.  This is a take-off from the Caraway Rye I did a couple days ago.  Instead of coffee, to render a rye flavor, I used Marsala wine as the liquid, and added something else, a secret ingredient to this bread that gave it a heavenly aroma along with a taste that made me keep going "mmmm-mmmm-mmmm" all the way through eating it.  The texture was the closest I've come to yet in a low carb, gluten free bread, to an actual real bread.


Saturday, August 11, 2012

CARAWAY RYE ALMOND BREAD, LC, GF


SANDWICH BREAD
OR
TOASTED


Another microwave 1 serving sandwich bread.  This is a variation of some of the others I've made, this time using a combination of almond flour and psyllium seed husk powder.  I've been wanting to try the psyllium seed and see how it affects me.  I really like the way it affects this recipe!  This bread is soft and the texture is much like wheat bread and I like the way it toasts.  Last night I made this in my GT Express and really liked the way it came out!  It takes 10 minutes in there versus 2 in the microwave, but I loved it!  I toasted it for an egg sandwich this morning and it was wonderful!  You can do it in Caraway Rye as I did in this recipe or just use another liquid such as almond milk or water for plain bread and leave out the Caraway seeds.  I made a really nice ham and cheese on rye for lunch yesterday with this toasted.  My next project will be to see if I can make a larger loaf version that is baked in the oven.  Would be nice to have a whole loaf of it on hand.  

CARAWAY RYE SANDWICH BREAD OR BUN                      

1 large  egg
2 tablespoons  coffee
1 teaspoon  oil
2 tablespoons  Parmesan cheese
1 tablespoon  almond flour -- blanched - such as Honeyville
1 teaspoon  psyllium seed husk powder
1/4 teaspoon  baking powder
1/4 teaspoon  caraway seeds
1/4 teaspoon  Splenda (optional)

In small, microwaveable container, the size of a slice of bread, OR a bowl to make a bun, add egg, coffee, and oil (melted if using coconut oil or butter).  Whisk with wire whisk until well mixed and frothy.

To liquid mixture, add Parmesan cheese, almond flour, psyllium seed husk powder, baking powder, caraway seeds and Splenda, if using.  (The Splenda does not make it sweet, but I think brings out a little more flavor).

Mix together well with a fork and microwave on high for approximately 2 minutes, or until all the way done in the middle.  Time will vary according to your microwave oven.  Mine is 1000 watts and takes 2 minutes.  

Plop out onto paper towel to absorb moisture and let cool for 5 minutes.  Slice in two and toast for best flavor.  (You can also make half the batter at a time for each slice if you prefer for half the time on each one.)

Variation:  If you have a GT Express, place all the batter in one side of preheated well and close lid.  Bake 9 to 10 minutes. Remove and let cool, then slice.

                                    - - - - - - - - - - - - - - - - - - - 

Serving Ideas : This is a very soft bread, and especially tastes good toasted for a ham on rye melt, or a Rueben sandwich.

As one serving: 218 Calories; 16g Fat (65.4% calories from fat); 12g Protein; 7g Carbohydrate; 5g Dietary Fiber

2 servings: 109 Calories; 8g Fat (65.4% calories from fat); 6g Protein; 4g Carbohydrate; 2g Dietary Fiber


Thursday, August 9, 2012

ICE CREAM DIBS, LC, GF


After several attempts at getting this just the way I want it, and 3 attempts at making a video, I finally have my ice cream dibs and video too.  I'm thinking of a variety of flavors that this could be made into.  Next time will make the peanut butter ones.  Just fold some peanut butter into the mix, or maybe I'll add some cocoa for chocolate, or maybe some of my Capella drops for another flavor.  Hmmm... raspberry would be good with a chocolate coating too.  Just use raspberry flavored sugar-free syrup in place of the vanilla.  Oh my... all kinds of ideas popping into my head!  Maybe you'll come up with more!  If you do, please share them!  These go fast in my house.  We were loving having to eat all the experiments!  I'll probably do some more today.  I am going to have to get some more ingredients!  I hope you love these as much as we do.  A nice small ice cream treat after a meal, when you don't need to fill up on dessert.


ICE CREAM DIBS                      

Ice Cream:
1/2  cup  heavy cream
2 tablespoons  sugar-free syrup -- (such as DaVinci or Torani)
1 tablespoon  sugar-free vanilla pudding and pie filling
Chocolate Coating:*
10 squares  Lindt 85% Cocoa bar* -- (1 full bar), chopped to small pieces
2   tablespoons  coconut oil -- (OR Palm oil shortening, such as Spectrum Organic, OR unsalted butter)
6 Packets  Truvia, powdered in coffee grinder -- OR 1/4 cup equivalent (Part of it should be erythritol based, or xylitol. Sucralose alone will not sweeten chocolate, neither will stevia alone, but combined with either of the above it should work)

Ice cream:  In small metal mixing bowl, combine heavy cream, sugar-free syrup, and sugar-free pudding mix.  Mix on low until blended and then whip on high speed until it is stiff.

Line baking sheet with non-stick aluminum foil, OR waxed paper, OR parchment paper.  With a scoop, dipping into hot water before each scoop, scoop onto lined baking sheet.  I use a 2 tbsp cookie dough scoop, but you can use a spoon, or place into plastic bag and cut one corner and squeeze onto pan.  Nutrition info will depend on how many scoops you come up with.  I came out with 10.  Place a popsicle stick in the center of each scoop.   Place baking sheet with dibs in freezer for at least 1 hour.

Chocolate Coating:  In small microwaveable container, place chocolate pieces, oil, OR shorening, OR butter, and Truvia.  Microwave on high 30 seconds, stir, then 15 seconds at a time until melted and smooth.

Dip each icecream dib into chocolate mixture and place back onto lined baking sheet.  It will instantly harden like a "magic shell".  Place in freezer to store or eat right away. 

*Lindt 85% cocoa bar does not use wheat in their ingredients, and takes utmost precautions to clean their equipment, however they do use the same equipment that products with wheat are processed on.  If you are highly sensitive to this, you can substitute 1 oz. square of regular unsweetened chocolate.  

                                    - - - - - - - - - - - - - - - - - - - 

10 Servings/Per Serving*: 127 Calories; 12g Fat (79.4% calories from fat); 1g Protein; 5g Carbohydrate; 2g Dietary Fiber

Whole Recipe*:  1269 Calories; 116g Fat (79.4% calories from fat); 15g Protein; 53g Carbohydrate; 15g Dietary Fiber

*The above nutrition info and in the video is figured with the whole chocolate coating, however I only used half of it actually in the recipe.  So for 10 servings, with an actual half of the use of the coating here is the nutrition info:

10 Servings/Per Serving: 86 Calories; 8g Fat (80.7% calories from fat); 1g Protein; 3g Carbohydrate; 1g Dietary Fiber

Whole recipe: 865 Calories; 80g Fat (80.7% calories from fat); 9g Protein; 34g Carbohydrate; 8g Dietary Fiber;